It's been a few weeks since I linked up with Sharon at Pintangle, to show works in progress. This isn't because I've been idle, but there hasn't really been a lot to show. I seem to be at that point in several projects where you simply get on with them and wallow in the meditative process of doing repetitive actions.
But there has been progress…
I found the perfect backing for my white quilt, a creamy cotton batik, which you can see at the top of the above photo. It was love at first sight and I think the texture is far more suited to this quilt than a Liberty lawn, which was my initial preference–the batik is more pocket friendly too! Now that the layers are basted together, I can get on with the quilting (such as it is). The original plan was to hand tie this quilt, but I've changed my mind and have decided to embroider little stars instead at each junction of the patchwork. That's a lot of stars!
Meanwhile, I've been working on my log cabin cushions and the second lot of blocks are half way done. As I've said before, I love the portability of EPP, so when these blocks are complete, I'll definitely be starting on something else.
Elizabeth,
x.
PS: There'll be more to follow on the fabric bomb idea–I hadn't forgotten, just working out a few details.
Showing posts with label Patchwork. Show all posts
Wednesday, 28 May 2014
Thursday, 1 May 2014
Tumbling blocks…
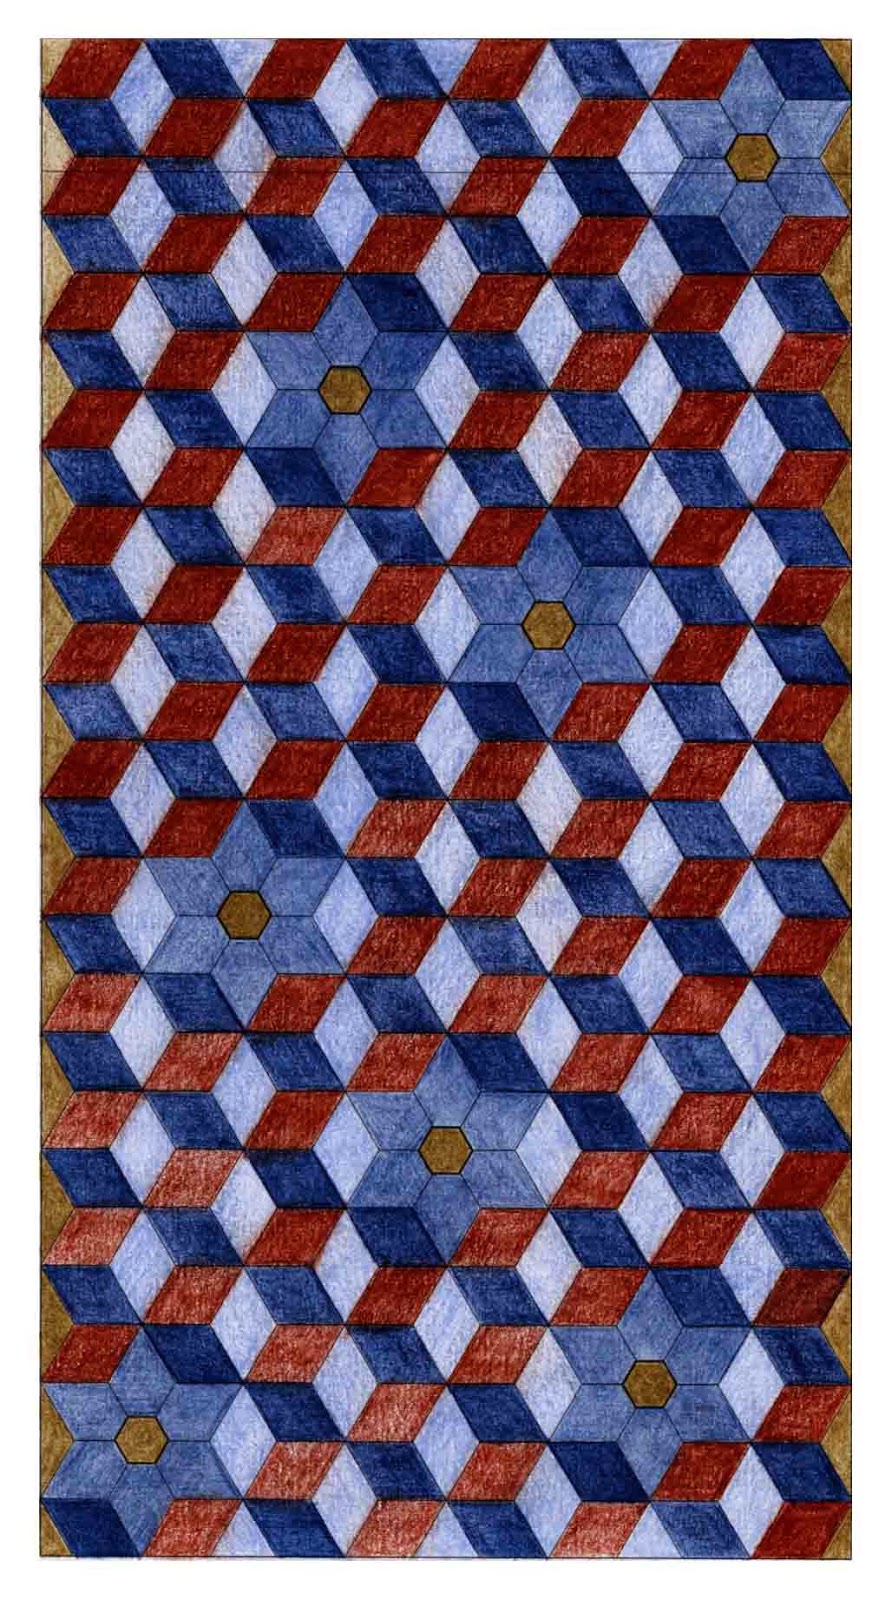
The perfect* backing for my white quilt continues to elude me, so I've started two other projects, both of which involve English paper piecing. I've wanted to do some more EPP for a while now as I really enjoyed making the hexagon strip for my white quilt. After all the recent freestyle embroidery, I felt it was time to do something traditional (with a few twists, of course) that requires disciplines such as measuring and planning rather than daydreaming and winging it.
One of the projects is a bolster cushion for our bed (more of which in another post), the other is a wall hanging made with Colourshott cottons. I am hideously late in arriving at the Colourshott party; the excuse for my tardiness is that I couldn't see what all the fuss was about. Being one of life's skeptics, quite simply, I didn't believe the hype (I'm far less curmudgeonly in other areas of life, in fact I'd go as far to say I'm quite trusting and cheerful). After purchasing the sample swatch books however, I can see I was wrong. Colourshott is just as fabulous as everyone claims!
So fabulous in fact that I've shelved my original plan for the wall hanging to be made from indigo dyed fabrics with metallic accents and am going for something much lighter and softer instead, (it was to see if the Colourshott range included a suitably metallic looking fabric that eventually persuaded me to try them). I still like the idea of using indigo dyed fabrics in an EPP project, but I can see now that including them in a wall hanging that also features an optical illusion might have looked a bit too 1970s hippyish–the kind of thing you might hang along side your Dark Side of the Moon poster. As I really would prefer something calming and contemporary, I'm hoping that the slight iridescence of Colourshott will work well with the tumbling blocks pattern and subtly enhance the optical illusion rather than induce dizziness and headaches in anyone looking at the final result.
Even when colouring in the designs by hand, with the original indigo scheme in mind, I could still happily while away the hours. All of which tells me this is either going to be the most absorbing project to sew, or, I'm a terrible procrastinator!
Elizabeth,
x.
* Actually, I thought I had found the perfect Liberty Tana Lawn backing, but when I calculated the cost, it worked out at over £100! So, not so perfect after all, this could be a very long wait.
One of the projects is a bolster cushion for our bed (more of which in another post), the other is a wall hanging made with Colourshott cottons. I am hideously late in arriving at the Colourshott party; the excuse for my tardiness is that I couldn't see what all the fuss was about. Being one of life's skeptics, quite simply, I didn't believe the hype (I'm far less curmudgeonly in other areas of life, in fact I'd go as far to say I'm quite trusting and cheerful). After purchasing the sample swatch books however, I can see I was wrong. Colourshott is just as fabulous as everyone claims!
So fabulous in fact that I've shelved my original plan for the wall hanging to be made from indigo dyed fabrics with metallic accents and am going for something much lighter and softer instead, (it was to see if the Colourshott range included a suitably metallic looking fabric that eventually persuaded me to try them). I still like the idea of using indigo dyed fabrics in an EPP project, but I can see now that including them in a wall hanging that also features an optical illusion might have looked a bit too 1970s hippyish–the kind of thing you might hang along side your Dark Side of the Moon poster. As I really would prefer something calming and contemporary, I'm hoping that the slight iridescence of Colourshott will work well with the tumbling blocks pattern and subtly enhance the optical illusion rather than induce dizziness and headaches in anyone looking at the final result.
![]() |
| Like the colours, but the arrangement still needs work. |
Above, is my favourite colour combination so far, it uses fabrics from the Impressions and Italy range of fabrics. I'm having so much fun playing around with options in Photoshop though, that I could easily spend the next 6 months producing slight variations on the same theme, without actually making a decision, let alone getting around to ordering the fabric.
![]() |
| Not so keen on these colours, besides, the design is off balance. |
![]() |
| How it might have looked– indigos, russet and metallics. |
Elizabeth,
x.
* Actually, I thought I had found the perfect Liberty Tana Lawn backing, but when I calculated the cost, it worked out at over £100! So, not so perfect after all, this could be a very long wait.
Friday, 28 February 2014
Mrs Wishy-Washy…
Recently, work has been full throttle and foot to the floor, so I haven't had as much time as last year for making and blogging about making.
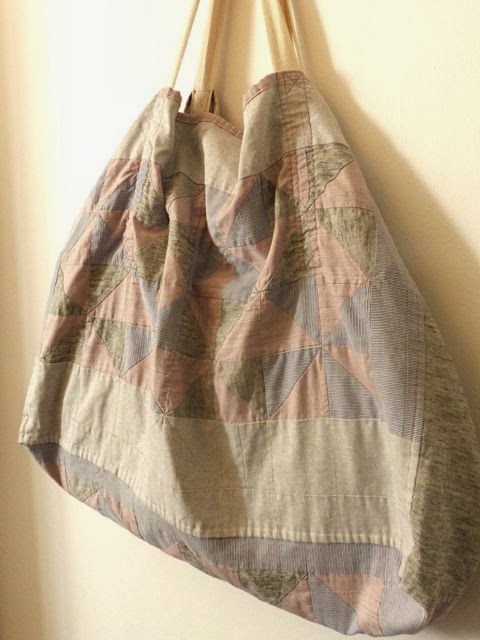
Of course, some making does get done, but it's of the necessary rather than frivolously pleasurable and playful kind. One such necessary make has been this pinwheels laundry bag, made from various linens and and a couple of old shirts I managed to persuade Patrick he no longer needs. Since our washing machine broke we decided to take advantage of the on-site launderette in our block of flats. The absence of a machine rattling away in the kitchen, damp clothing draped over makeshift driers, and disputes about whose turn it is to do the laundry/put things away, has been such a pleasant surprise that we've decided not to bother replacing our old machine. However washing our dirty linen in public can be embarrassing, and I certainly don't want our neighbours getting a peek at my smalls through transparent Sainsbury's carrier bags (I suspect they're not too keen on seeing them either).
So this bag needed making fast! It needed to be strong as well as light and roomy enough to take a full load of washing without weighing a ton. The result is a floppy shopper, but it does the job perfectly, although I need to add another, stronger, set of handles–something like upholstery webbing would work well.
For those who don't already know, Mrs Wishy-Washy is a character from a children's storybook by Joy Cowley. Now that I have my laundry bag, I feel compelled, as a matter of necessity, to make a Mrs Wishy-Washy apron and headscarf too, if I do, I'll be the chicest laundress on the block!
Elizabeth,
x.
PS: Mrs Wishy-Washy is not to be confused with Wishy-Washy, the dim-witted brother of Aladin (we're talking the pantomime version here). Their mother is Widow Twankey, who is in fact a washerwoman with a fondness for innuendo and outlandish costumes. I doubt very much that Mrs Wishy-Washy would have approved of her.
Monday, 27 January 2014
Pinwheels…
A surge of Spring cleaning madness and general home titivation has overcome us. Sainsbury's bags for life no longer cut it as laundry bags, so I decided we needed something a little more stylish. Here's the front of our new laundry bag–it's going to be big, and will need to be sturdy, thankfully, it's coming together pretty quickly. Only a few hours of cutting and sewing, followed by a little bit of stretching and pinning, and the top was ready for quilting. Although small enough to quilt on the machine without need for bicycle clips to keep rolls of excess fabric a little more manageable, I'm going to quilt it by hand instead. Afterall, it's cold outside and hand quilting will keep my lap lovely and warm.
By the way, has anyone else joined in with the RSPB's great British garden birdwatch? As a would be twitcher, I love nothing more than looking out for feathered creatures (birds of prey are my favourite, but you don't get many of those in Southeast London). All week long, Blue tits, Long-tailed tits, Great tits, a Robin and a blackbird could be seen pecking at the feeders on the lavender bush outside my studio window. At the back of the flat, a Green Woodpecker visited on an almost daily basis, while Parakeets that nest in the neighbouring park are regularly sweeping past. But come the hour of the intended watch & record, not a bird was to be seen–not even a pigeon–typical!
I'm debating how to fill in my form: tell the truth, or 'embellish' it.
Elizabeth,
x.
Monday, 22 July 2013
Lucky me!
Apart from crawling from one shady spot to the next, the last week has been spent, slowly working on my white quilt. All the hexagons are sewn together, and I've almost finished the 'barnacle' block which I'm outlining with strips of folded fabric to form ruffles around the main cluster of barnacles.
I've made a start on another block: this one features kantha embroidery, and the tiniest bit of mola reverse applique – just a central velvet circle, surrounded by a larger silk circle, which sits on a raw edge linen circle (it's quite gauzy, so conveys the translucence I'm after). The subject is a couple of dandelion seed heads. So far, I've partially completed the first seed head, and I'm really trying to resist the urge to include some pale green for the stem – this is after all, meant to be a white quilt! I couldn't resist adding a halo of tiny gold beads however, so perhaps that's enough deviation from the main colour theme?
Cutting the squares and rectangles that will form the main patchwork is taking much longer than I thought it would – there are so many of them – next time, I'll make bigger patches! But a totally unexpected, and very generous gift, from Kate, has got me itching to put my rotary cutter to work. Kate gave me a super pile of unwanted antique linens, including this gorgeous baby dress. Part of me thinks it's a crime to cut them up, but if the alternative, is for them to never see the light of day, then surely it's better they are used, rather than hidden in a stash box?
As if all this beautiful linen wasn't enough, Kate also gave me this fabulous indigo dyed fabric! I'm not yet absolutely sure what to do with it, but there's certainly enough to make a very striking pair of ceiling to floor curtains.
Now my friend may have a fabric stash to rival that of Liberty's, but this really is quite generous, don't you think? In fact, if it wasn't for the weather, I could almost believe it's Christmas.
Elizabeth,
x.
![]() |
| The ruffles make this barnacle look almost rose like. |
![]() |
| The EPP is complete. |
I've made a start on another block: this one features kantha embroidery, and the tiniest bit of mola reverse applique – just a central velvet circle, surrounded by a larger silk circle, which sits on a raw edge linen circle (it's quite gauzy, so conveys the translucence I'm after). The subject is a couple of dandelion seed heads. So far, I've partially completed the first seed head, and I'm really trying to resist the urge to include some pale green for the stem – this is after all, meant to be a white quilt! I couldn't resist adding a halo of tiny gold beads however, so perhaps that's enough deviation from the main colour theme?
![]() |
| A nearly dandelion, and, patches ready for sewing together. |
Cutting the squares and rectangles that will form the main patchwork is taking much longer than I thought it would – there are so many of them – next time, I'll make bigger patches! But a totally unexpected, and very generous gift, from Kate, has got me itching to put my rotary cutter to work. Kate gave me a super pile of unwanted antique linens, including this gorgeous baby dress. Part of me thinks it's a crime to cut them up, but if the alternative, is for them to never see the light of day, then surely it's better they are used, rather than hidden in a stash box?
![]() |
| So pretty! |
![]() |
| Look at the detail, all done by hand too! |
As if all this beautiful linen wasn't enough, Kate also gave me this fabulous indigo dyed fabric! I'm not yet absolutely sure what to do with it, but there's certainly enough to make a very striking pair of ceiling to floor curtains.
Now my friend may have a fabric stash to rival that of Liberty's, but this really is quite generous, don't you think? In fact, if it wasn't for the weather, I could almost believe it's Christmas.
Elizabeth,
x.
Thursday, 27 June 2013
The longest journey…
starts with a pile of hexagons. I am probably the world's slowest quilter, possibly because I like to do as much as I can by hand, rather than machine. Machines tend to splutter and choke on thread, while needles can snap, fingers just get sore and need a little rest.
Time to cut more scraps.
Elizabeth,
x.
Monday, 17 June 2013
I think it's time I made a quilt…

I've got the quilting itch. Okay, maybe not for a conventional quilt, but still a quilt of sorts. I want it to feature: English paper pieced hexagons (my nod to tradition), kantha, drawn thread work, raw edges, hand tied elements, muslin and linen – lots of linen! I want as much of my quilt as possible to be made from existing textiles: pillow cases, napkins, nighties, monogrammed handkerchiefs, and anything else I can lay my mitts on. And I want it to be white, with only the teeniest flashes of colour (like the red telephone box against the snow in the above mood board). The moodboard is a collection of fragments from here and there: exhibits from last year's festival of quilts at the NEC, BooDilly's muslin patchwork–which I just love, some drawn thread work, a quire of deckle edged paper, snow, cracked ice, and a few bits of my own.
There, I've made my declaration, so I'd better make a start and put my words into action. As for the size, I haven't a clue, that's a detail for later, first I need to gather my materials.
Elizabeth,
x.
Monday, 10 June 2013
My little dumpling bag.
Less of a rigid gaming purse, more of a floppy sack, but I'm fond of it nevertheless and intend to use it for carrying sewing supplies when I'm on the go. More of these are on the cards, perhaps as gift bags filled with goodies. Or, maybe next time, I'll adapt my pattern and turn it into a shifuku (a bag for carrying tea caddies) which I have Queenie to thank for bringing to my attention. I might even make an azuma bag, as this would give a greater surface area for trying out more shashiko.
You see, I am, and always have been, something of a bag lady. While other women obsess over shoes, my passion is for handbags – and leather gloves, (is there anything more chic than a beautiful bag and glove combo?). Whatever I choose to make, one thing is for sure, it will feature more of these little flowers – they're so simple and sweet to make.
Elizabeth,
x.
Thursday, 23 May 2013
A Challenge
Q: How do you photograph an enormous floor cushion when your floors are black and London is covered by dark and moody clouds?
A: With great difficulty!
Add to that, that I want to show both the back and front together, and I realise I've set myself quite a challenge. However, with the use of mirrors, drawer handles (to give a sense of scale) a ladder and a sheepskin rug, I think I've just about managed to do justice to my boro inspired cushion. Of course, I could have waited until the sun came out, but Willow has been eyeing the cushion covetously, so I had to take photographs before she gets her claws into it, and, quite literally reduces my work to scraps and rags. (Before you say that we should be stricter with her, Patrick and I try, but she is viciously defiant–we have the scars to prove it).
As you can see, the back is fairly plain. I've used part of a linen metis sheet, which is crisp and gloriously heavy, for the backing, and have added a band of very simple shashiko. I had plans for a hemp leaf design, but in the end thought this overcomplicated and at odds with the cushion top. I fully intend to try a more challenging shashiko project, possibly a drawstring purse of some kind, but at the moment I'm in love with straight lines, and how effective they are when used en masse.
For the fastenings, I've made I-cord from the same variegated cotton perle I used to embroider the cushion, and a few of my indigo dyed Dorset buttons.
I'm really happy with how my cushion turned out, and will make a few more, in the same style. Unfortunately, all the best bits of my indigo dyed fabrics have been used up, so I'll either have to buy some, or find somewhere with the facilities where I can make another batch. Alas, a gardenless flat just doesn't cut it.
Elizabeth,
x.
Monday, 29 April 2013
Behind the seams
It's not the first time I've fallen in love with the back of something I've made. Not so long ago, I made a needle case from scraps of Japanese woven cloth, and nearly chose to assemble it so the seams were on the outside, and the neat finishing, hidden from view. Convention got the better of me, or perhaps, I just didn't want anyone who spied my needle case thinking I'd sewn it together incorrectly.
But this fondness for exposed seams, raw edges and knots is definitely telling me something, and I suspect they will feature heavily if future projects. First I need to finish the back of the cushion, and by back, I mean the reverse, not the inside where all those lovely seams and raw edges are hidden.
Elizabeth,
x.
Wednesday, 17 April 2013
Pulling the scraps together
In keeping with the boro inspired theme, I'm sticking with a simple patchwork of strips and squares for my giant floor cushion. On to the basic patchwork I've added a bit of pleated linen, and a square of silk shibori. I've deliberately left the raw edges exposed as I quite like the feathery effect of frayed silk. I'll add more layers and other bits of manipulated fabric later, but first I want to do some stitching.
For a while, I've wanted to try my hand at shashiko, but was nervous of doing so–perhaps learning a new skill felt too daunting? Somehow though, shashiko seems right for this piece, so I've taken the plunge (I have Cynthia at aquilterbynight partly to thank for that!). The front will feature straight lines only, but lots and lots of them. I'm hoping that as I add more layers of fabric and stitch over them, the result will not only give an interesting texture, but also, a visual depth to the patchwork–we'll see. The back of the cushion will have a more intricate design. At the moment, I'm leaning towards a hemp leaf design, which feels appropriate since boro textiles were usually made from indigo dyed hemp.
Rather than use traditional shashiko thread (see, I can't even start off by following the rules!), I thought I'd try a variegated cotton perle instead. I had a lovely dark blue/white spool of thread, but rather foolishly left it within Willow's reach. My cat has little love for embroidery but does appreciate how a reel of cotton rolls along the floor, and can be batted under sofas, and into all sorts of nooks and crannies around our flat. So now, I can't find my blue and white variegated thread, and Willow isn't letting on where she left it. I'll just have to use plain white instead!
Elizabeth,
x.
Saturday, 6 April 2013
Into the Blue
Everything is blue, my Dorset buttons, some once brightly coloured little pegs. Even my fingers, and it's not just because it's so cold outside. Rather, it's because I've been on an indigo dyeing course, and unbeknown to me, there was a small hole in one of my rubber gloves.
The course was run by my old patchwork & quilting tutor, and it did not disappoint, although at times, it felt as if I had been transported back to school chemistry lessons. (It came as quite a surprise to discover that I'd be dealing with chemicals such as Caustic soda and Sodium Hydrosulphite!).
Of course, it is possible to indigo dye at home, but you do need decent facilities – preferably a dedicated utility area, with a large sink to rinse out the the excess dye, drying areas, and somewhere to store and mix the chemicals, but who really has that much spare space? Certainly not me, so a fully equipped art studio was the ideal environment to start, even though the real skill is in how artfully you twist, fold and tie the fabric, which can be done pretty much anywhere and then taken along to class.

My attempts at Shibori (twisting, stitching, folding, compressing and tying fabric) were mixed, but then I am a beginner. The patterns in the above three pictures were achieved by twisting silks and linens then either stitching them into place, or binding them with jewellery wire. In some cases, beads were inserted in between the twists to create another barrier (or resist) to the dye.
The above image proves that more effort doesn't necessarily produce better results. I spent hours wrapping cocktail sticks in pieces of knotted string, thinking It would give me a repeated twiglet like pattern. Instead, all I got is this drippy, mottled sludge!
My attempts at folding fabric and placing objects between the layers to produce interesting effects, needs work too. You can – just about – see the impression of some Dorset buttons, in the above pic, but I really should have left the fabric to dry completely, and settle into crisp, sharp lines but impatience got the better of me. (When I look at this fabric, I can't help but think of Britney Spears and Justin Timberlake in their matching stone wash denim heyday).
Now, I just have to do something with my indigo dyed fabrics, but part of me is reluctant to cut into them, as even the less successful ones, feel so precious to me. I have a large patchwork cushion in mind. I'd like it to feature raw edges (almost as if you're looking at the reverse of the patchwork in places) and then build up layers of fabric in other areas. I also want to include Kantha stitching (or some very simple Shashiko, if I'm feeling brave) but perhaps I'm letting my ambition and imagination run away with me! This one definitely needs more thinking about before I pick up my rotary cutter.
Elizabeth,
x.
PS: I'm linking up with Nat at Made in Home, why not join in?
Wednesday, 13 March 2013
My Big Fat Cushion
January's was on the baggy side, so I made February's a tad tighter. So what if it now looks as if the cushion is straining to bust the cover's seams at the middle–I think the use of recycled linens, and fabrics cut on the bias will help it stretch over time. At the moment, however, my Log Cabin cover is so taut, no imprint is left when I lean against my cushion. I wish I could say this is because of my airy, sylph-like physique, alas no, like my cushion, I too have a tendency to strain at the seams!
Both my January and February cushions were based on traditional blocks, but I'd like to do something different for the next, which means it won't be finished by the end of March. I've been doing some Indigo dyeing recently, and think this combined with Kantha stitching could be interesting. I suspect it will turn into something of a longer term project, but then again, it's always good to have something to get your teeth into, even if that means failing in my New Year's resolution to produce a cushion a month!
How are you keeping up with your New Year's resolutions?
Elizabeth,
x.
Tuesday, 26 February 2013
A calendar of cushions–February
Well, it's only February, and already my New Year resolution to make a cushion a month is falling behind schedule. Goodness knows what I'll have to show come July–I'll probably be passing off old pincushions as recent makes! Still, I have a few days left to finish this Log Cabin cushion, the top is almost done, I just need to add a small border. I had thought of teeny tiny HSTs for a border but am now inclined towards small bars made up of the red and pink linens.
Or, am I getting a little carried away with myself; after all they are just dolls!
Elizabeth,
x.
Subscribe to:
Posts (Atom)